In our last look into the mysteries of Microsoft Word, we explored the ruler function, particularly using this tool to automate indentation of text. Now, a simple indent at the start of each paragraph is something you see every day, probably without even noticing, in nearly all printed books, magazines, and newspapers. You’ve probably done it yourself if you’ve ever kept a diary or hand-written a letter.
Rather curiously, online texts like this blog do not generally use an indentation to signal the start of a new paragraph, but rather insert a blank line between paragraphs. The reasons for this are rooted in the contrasting technical limitations of online and print media. Early programming languages had no standardized command for rendering a tab indent onscreen; at the same time, onscreen text was not bound by the size constraints of newsprint, meaning you could insert blank lines with gay abandon without ever having to worry about wasting paper. Whatever its origins, this quirk has become firmly entrenched as a convention of online writing.
My point in all this is that the first-line indent, by virtue of being so ubiquitous, seems quite intuitive and natural. But there’s another kind of indent, found almost exclusively in academic writing: the hanging indent.
Get a free sample proofread and edit for your document.
Two professional proofreaders will proofread and edit your document.
Don’t Leave Me Hanging, Bro
 Put simply, a hanging indent is the opposite of a standard indent. The first line of each paragraph is un-indented (or “flush left”), whereas each subsequent line is indented a half-inch. This formatting is often found in the bibliography sections of academic papers; it is mandated, for instance, in the APA Publication Manual, the MLA Handbook, and Kate Turabian’s A Manual for Writers (which is basically Chicago), the most commonly used style guides in the humanities and social sciences.
Because it’s counter-intuitive, the hanging indent flummoxes even highly educated writers. At ProofreadingPal, we often work on papers by grad students and PhD candidates—scholars who’ve written hundreds of pages of academic prose in their careers—and improperly formatted references are by far one of the most common issues we see.
Before we learn some simple techniques for formatting a proper automated hanging indent, we should understand why it matters.
The Manual Fake-Out
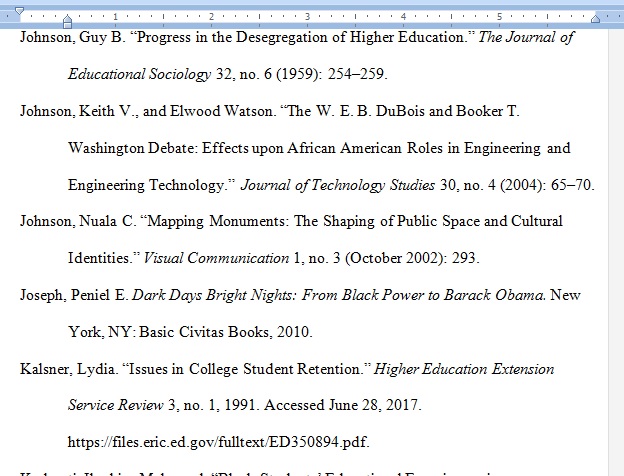
Here’s a screenshot part of the bibliography section of a paper I recently edited.
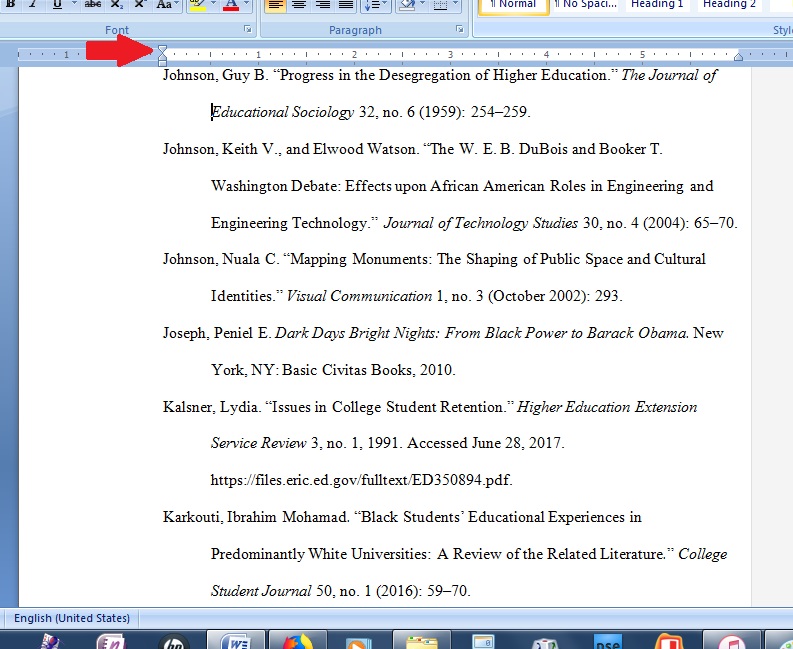
At first glance, everything looks good. All the text is properly aligned. But look at the ruler at the top of the text, particularly that left-hand margin slider. Notice that both the top and bottom tabs are set to flush left. So why does this text show a half-inch indent on some lines? Let’s take a look at the hidden characters to find out. We click on Word’s Home tab, then click on the button showing the paragraph symbol, also called the pilcrow ( ¶ ). This lets us see all the formatting marks that normally remain invisible when we view text onscreen.
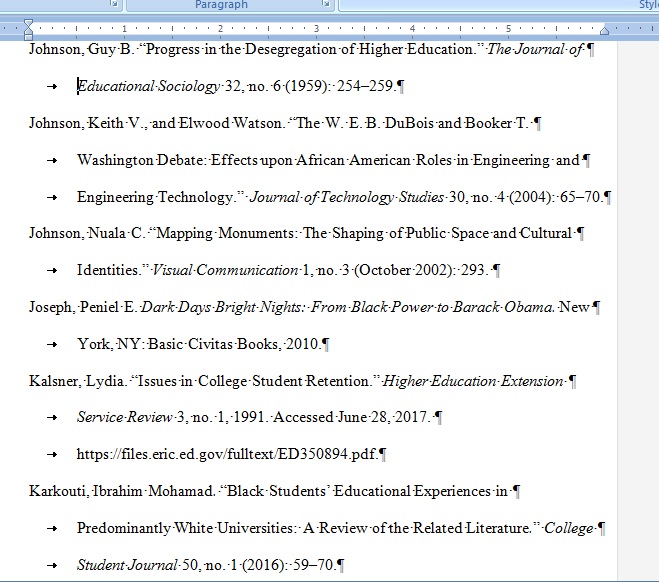
Now we see a rather different picture. Our scholar has put a hard return at the end of every line, and has manually indented some lines with a tab. In other words, he’s created the appearance of a hanging indent with manual formatting. This looks OK for now, but the effect is only sustainable if you don’t change a single parameter.
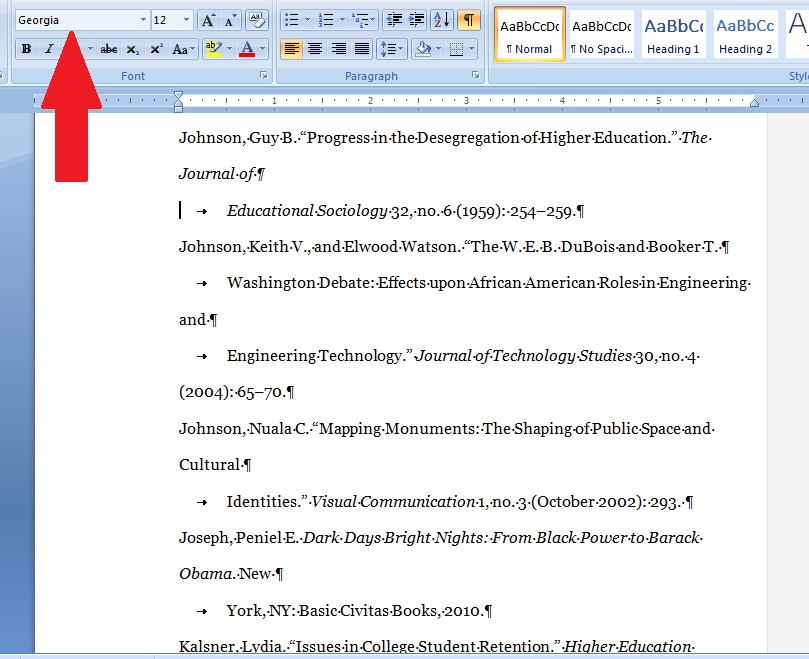
Look what a mess we’ve made just by changing the font from Times New Roman to Georgia, just for instance! Lines break in the middle of phrases; indentations seem to come at random. We would see similar havoc if we changed the font size or sought to format the page to print on anything other than 8.5 x 11 paper.
The whole point of using electronic word processing in the first place, instead of a typewriter or steno pad, is to make your text more usable, to allow readers to view your work using the paper, printer, and type size that best suit them.
So appropriately, with just a couple of steps, we can reformat this text for maximum usability while leaving the hanging indent intact.
The Fix Is In
First, let’s get rid of those unnecessary hard returns and tabs. This process is easy to automate using the Find and Replace feature.
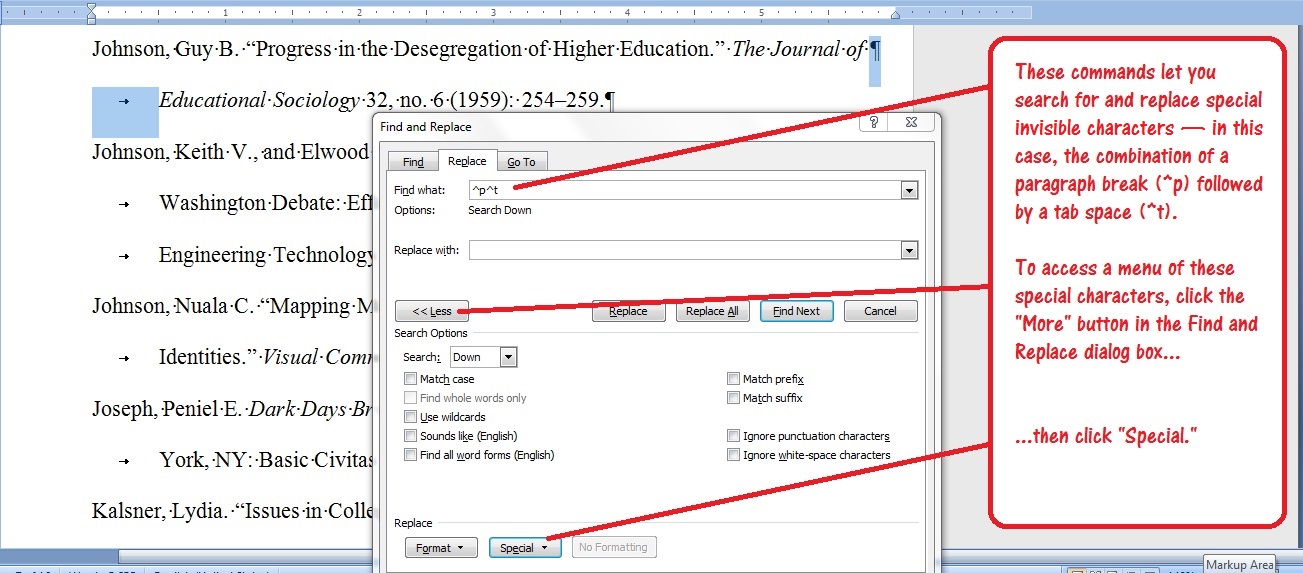
With that done, you’ll see that the paragraph breaks at the end of each entry are still in place; our search string only deletes the combined occurrence of a hard return followed by a tab.
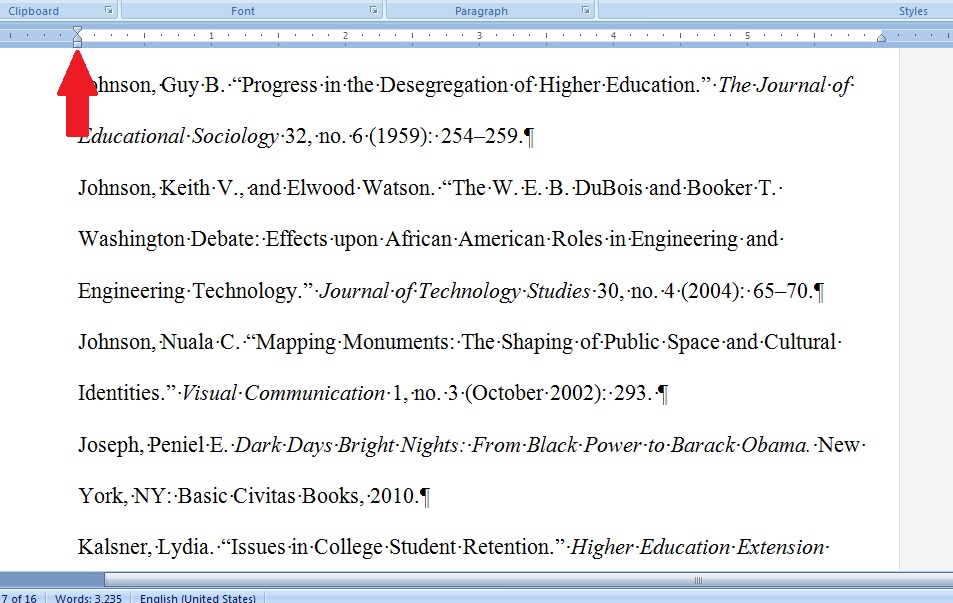
The text flows normally, and it’s all flush left. Those who are visual thinkers can use the left-hand slider to set the hanging indent. Let’s have a closer look at the slider.
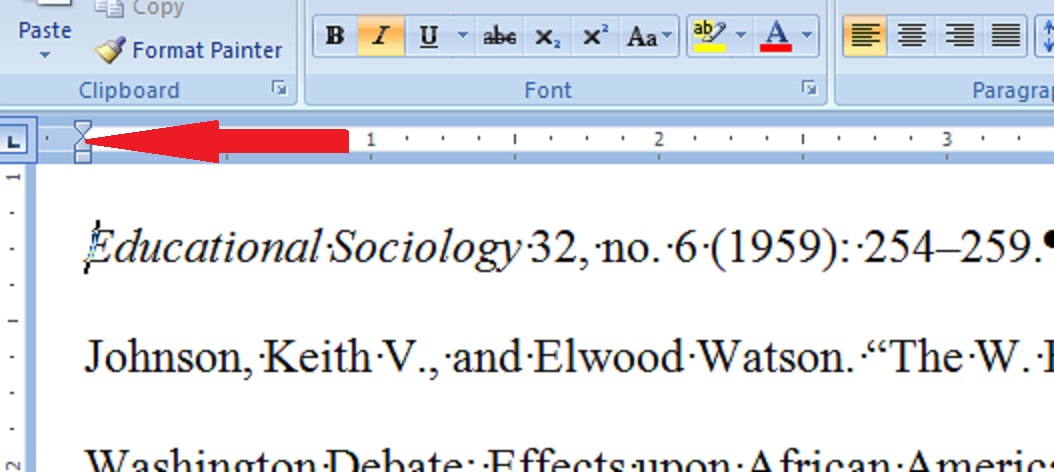
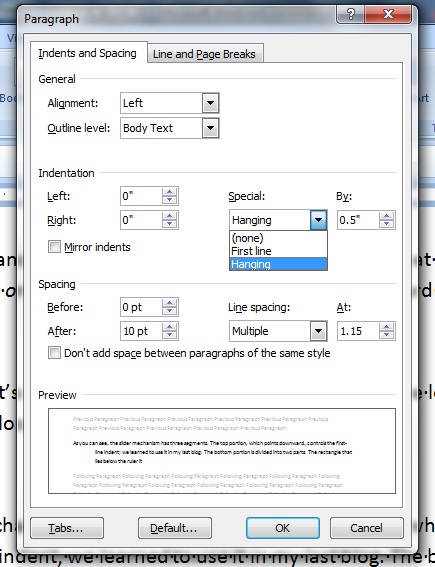
As you can see, the slider mechanism has three segments. The top portion controls the first-line indent; we discussed it in my last blog. The bottom portion is divided into two parts. The rectangle that lies below the ruler itself (the left indent marker) moves the top and bottom indent markers together and maintains the proper distance between them. We only want to move the hanging indent and leave the first-line indent at flush left, so we’ll need to click and drag the upward-pointing slider.
Alternatively, we can double-click on the slider to open a dialogue box and adjust the margins and indents that way.
In any case, this hanging indent gives us the look we want.
And the indent stays in place even if we mess with the text, as I’ve done here by boosting the font size.

Automating the flow and indentation of text means that you can use large print, make corrections in the middle of a line, even print the whole document to dozens of index cards, and the formatting will remain consistent—meaning your text is truly portable.
I’ll be back with more Microsoft Word tips and tricks in future blogs. If there’s a topic you’d like me to cover, sound off in the comments below.
Jack F.
Get a free sample proofread and edit for your document.
Two professional proofreaders will proofread and edit your document.
Get a free sample proofread and edit for your document.
Two professional proofreaders will proofread and edit your document.
We will get your free sample back in three to six hours!


© 2010 - 2020 ProofreadingPal LLC - All Rights Reserved.