As I was doing some research for my previous post about getting the most out of Microsoft Word’s spell check, I found an interesting method to deal specifically with homophones and other commonly confused words like affect and effect, aural and oral, and canvass and canvas, which spell check often misses. This method involves adding a macro to Word that will highlight a list of words of your choosing in a document. After you run the macro, you can go through the highlighted problem words and ensure you’ve got the right words in the right places.
Get a free sample proofread and edit for your English document.
Two professional proofreaders will proofread and edit your English document.
For anyone who has not used macros before, macros are little programs you can add to Word to make it do pretty much anything you’d like done to a document such as highlight two spaces after a period, automatically identify inconsistent font sizes, swap certain words, and highlight specific words or phrases, such as homophones and commonly confused words. If you’ve used Word much, you’ve undoubtedly at some point thought, “Why can’t Word automatically [——]?” Well, macros are the answer: Word can do much more than it does in the version you purchase, as long as you teach it to use macros.

Archive Publications has an excellent compendium of hundreds of macros for writers and editors. From the linked page, you can download the entire collection of macros as an e-book, or you can click on individual links to specific portions of the book that may interest you (e.g., “Introduction to macros,” “Pre-editing”).
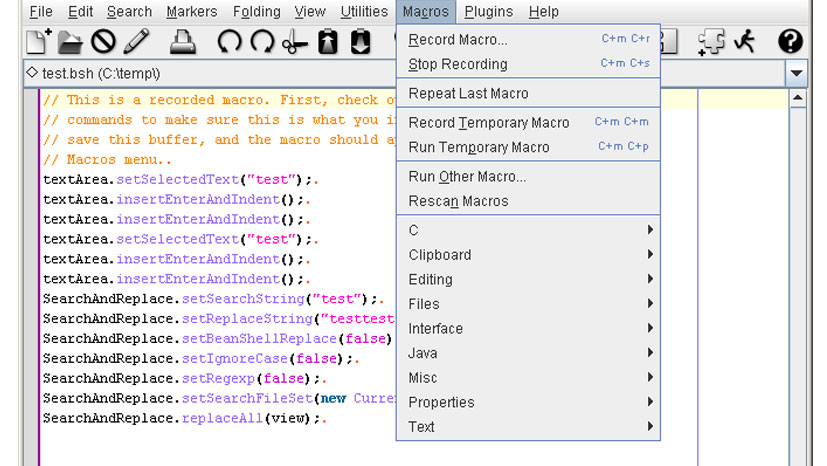
To get started using macros, you first add macros to your version of Word and then run them. There are two ways to add macros. The first is to record them yourself by indicating to your computer what you want it to do. The second way is to input macros using Word’s Visual Basic Editor; you can write your own macro, or you can copy and paste someone else’s.
To add macros by recording them, follow these steps:
To add macros using Visual Basic Editor, follow these steps:
This process did not work for my version of Word because I had to first add a Developer tab. On the Word menu, I chose Preferences and clicked on “Ribbon & Toolbar.” Then I checked the box next to “Developer” under “Customize the Ribbon.” My Word also did not have a Code button, but when I clicked on Visual Basic on the Developer tab, I found where macros are stored in normal>Modules>New Macros. This screenshot will show you:
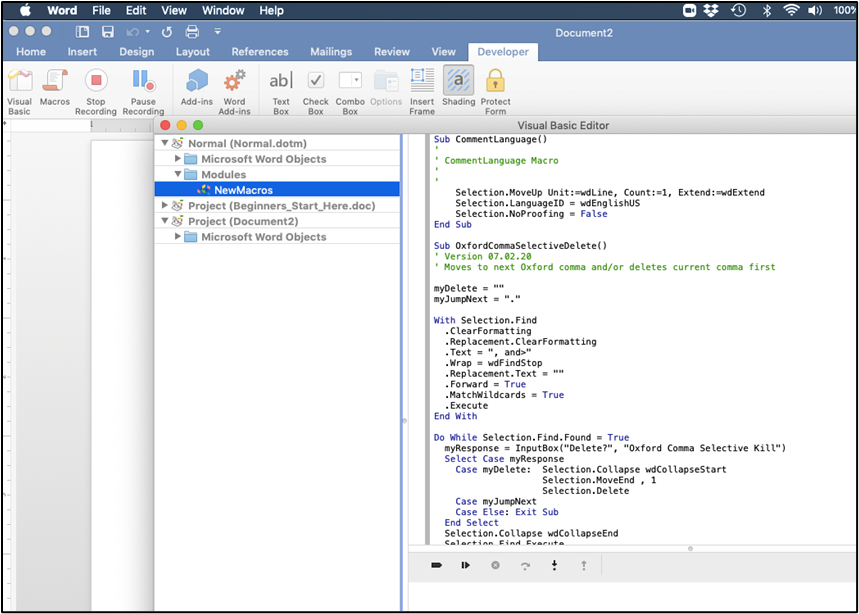
If you haven’t added any macros yet, this window will be blank, but after adding macros they will all appear here. To add a new macro, scroll down to the bottom of the window and add the content below the last line.
Macros don’t automatically run themselves, so once you’ve added macros, you’ve got to follow some steps to make them work:
The macro will perform its task, and you can take any action steps necessary to complete the related work (i.e., delete extra spaces highlighted by the macro, change spellings, and so on).
Now that you know what a macro is, how to add one to Word, and how to run one, I’ll discuss that exciting (yep, I’m a nerd about this type of thing) macro I mentioned before that highlights commonly confused words. To install this macro, you’ll need to do two things:
Important: you must be sure your file name matches the file name in the macro exactly in the text of the macro indicated by the first arrow. Also, to make the macro catch more instances of commonly confused words, change “True” to “False” following “MatchWholeWord” and “MatchCase”—that way the macro will also catch uses of the words from your list that match partially but perhaps not entirely (like the word accepting doesn’t entirely match the word accept, but is also commonly confused for excepting).
Once this macro is added in Visual Basic, you are ready to use it. Follow the steps above to run the macro, and you’ll see the words on your problem word list highlighted, ready for you to decide you’ve used them correctly.
Sarah P.
Get a free sample proofread and edit for your English document.
Two professional proofreaders will proofread and edit your English document.
Get a free sample proofread and edit for your document.
Two professional proofreaders will proofread and edit your document.
We will get your free sample back in three to six hours!


© 2010 - 2020 ProofreadingPal LLC - All Rights Reserved.