Microsoft Word has a lot of bells and whistles, some of which are great (auto-replace) and some of which are, uh, garbage (auto-citations).
Fortunately, MS Word’s Table of Contents (ToC) feature works quite well and is more than worth the effort, especially for long documents, as it not only updates the numbers as you edit and revise but also gives you a way to quickly navigate to different sections.
The process is straightforward. First, you use the Styles function to mark and format your headings and subheadings, and then you generate the ToC. You can then update the page numbers as you like.
Format Normal Text

For a basic ToC, we’re going to use the Normal Style and Headings 1–3 Styles.
Get a free sample proofread and edit for your English document.
Two professional proofreaders will proofread and edit your English document.
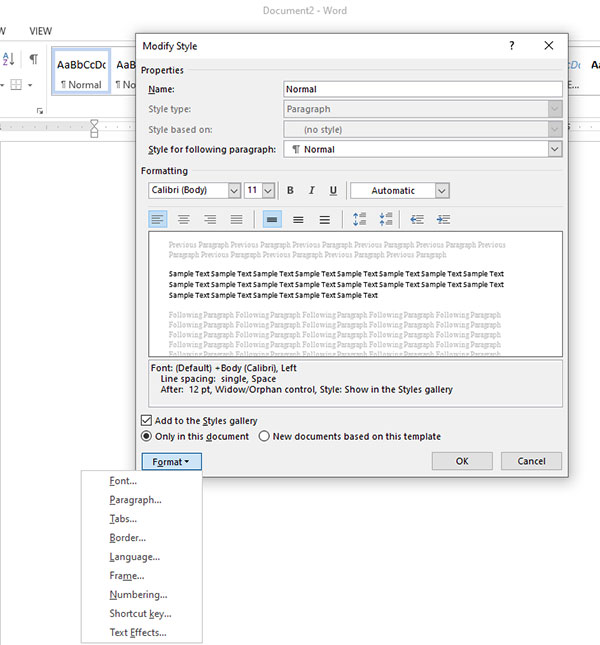
When you are typing up your non-headings or normal text, you want the style to be under Normal. If you don’t like the current Normal Style, you can change it. Right-click on the Normal Style square and select “Modify.” Follow the menu to make the normal text look however you like. (You can skip this step, but it may help you later if you’re using a lot of styles or want to change things easily from other styles back to Normal.)
Note that you have all the usual suspects, including:
Format Title and/or Heading 1
Write out your title or your first-tier heading. Make sure your cursor is anywhere on that line and click “Heading 1 Style.” Probably, your text will turn blue in a weird font. Right-click on the Heading 1 Style square and click “Modify.” For this document, I have made the Heading 1 Style bold, black, Times New Roman, 12 pt., double-spaced, and left-aligned.
But, you may say, the title is centered! Yes, after you customize a style, you can manually change the text. So I have both the title and the first-tier heading modified as left-aligned, and then I centered the title manually.
Format Heading 2
Type out your second-tier heading, place the cursor along the line, and click the Heading 2 Style square. As you can see, I’ve modified Heading 2 Style as bold, black, Times New Roman, 12 pt., double-spaced, and left-aligned.
Format Heading 3
Type out your second-tier heading, place the cursor along the line, and click the Heading 3 Style square.
But, oh no! Perhaps there is no Heading 3 Style square!
No problem. Go to some other square, right-click on it, and select “Rename.” Call it Heading 3 (or whatever you would like, but cute names get confusing). And then proceed as usual. As you can see, I’ve modified Heading 2 Style as italics, bold, black, Times New Roman, 12 pt., double-spaced, and left-aligned.
Navigation
Check out your Navigation window. If it’s not showing, go under the VIEW tab and click the box for “Navigation Pane.”
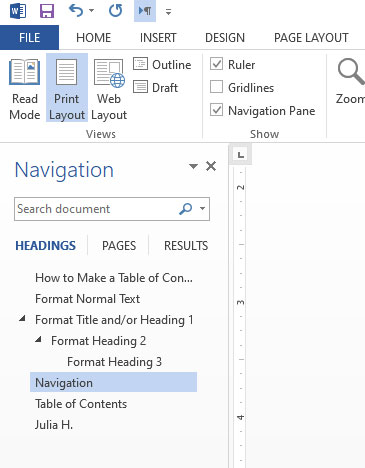
You’ll see that Word is making an outline of your paper. Click on the different lines of the outline, and Word will take you to that heading.
What’s more, if you click on a line in the Navigation Pane and drag it, Word will move that section around for you in the text. You can also use those little triangles/arrows to hide/unhide subsections from view, such as when you want to concentrate on a single chapter.
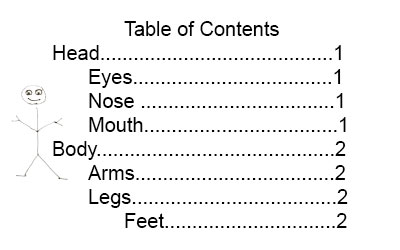
Table of Contents
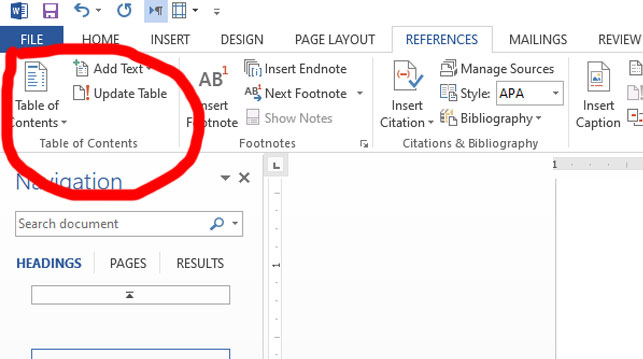
Go to the page where you want the ToC to be, go to the REFERENCES tab, and click on the Table of Contents square.
At that point, you can click on one of the Automatic Tables and then manually change the table format in the text or click on Custom Table of Contents and set up what you want. Then you click to insert the ToC.

To make changes, just type what you want into the text. To update the page numbers, once you have it looking the way you want, just left-click on the ToC (anywhere) and you’ll see an Update Table tab.
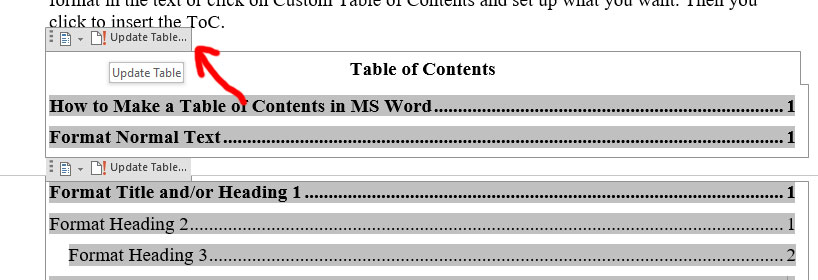
Click on the tab and select “Update Page Numbers Only.” If you have added headings or made other changes, click on “Update Entire Table.” Be warned, however, that this will eliminate any manual changes you have made to the table.
Personally, I find setting up a custom ToC to be a pain, so I choose an automatic table and make no manual changes to the table until I’m done with the paper and can update it as often as I want. Then I just go in and manually make the table look the way I like. But you’ll find your own preferences.
Coming next time: ToC Advanced Features.
Julia H.
Get a free sample proofread and edit for your English document.
Two professional proofreaders will proofread and edit your English document.
Get a free sample proofread and edit for your document.
Two professional proofreaders will proofread and edit your document.
We will get your free sample back in three to six hours!